Displaying a Calendar in Salesforce 1
Posted: April 29, 2014 Filed under: Salesforce Tips and Tricks, Salesforce1 | Tags: Calendar, List Views, Salesforce1 5 CommentsSalesforce1 is a great tool for road-warriors; it lets them see key contact and account information anywhere, update opportunities in real-time and add notes, photos and other updates from meetings. There is one big thing missing though–the ability to see a calendar of activities.
Until Salesforce gets this functionality added, I have created a workaround using Visualforce and Activity List Views to create a new Salesforce1 calendar view accessible from the Navigation menu.
Here’s how to add a calendar view to Salesforce1 in 3 easy steps:
Step 1: Start by creating Activity List Views
- Start by going to the following url https://naX.salesforce.com/007 (be sure to replace the X with the number assigned to your org).
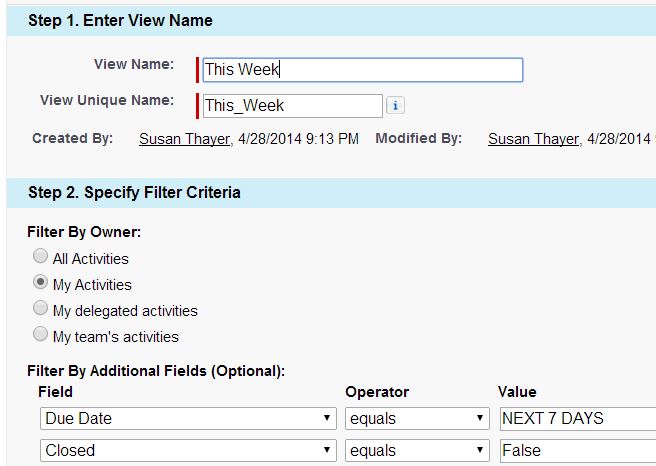
- Then click on “Create New View” and create a list view per normal.
- Filter on “My Activities” that are not closed. Use Due Date to add your time range. <TIP>You can use relative date values, such as “This Week” or “Next 14 Days” in your filters.
- Since this will be loaded on mobile devices, I recommend a max of four columns; due date, subject, (contact) name, and related to.
- After you save the list view make note of the list view ID. This is shown in the url on the screen that appears after you click “save”. You’ll need the list id for step 2.
Note: You can create multiple list views such as “This Week” and “Next Week” or larger time periods like “Next 30 Days”. Views can be combined into one tab or create separate tabs. Be sure to keep download speed in mind when designing list views.
Step 2: Create a Visualforce page to display the activity view
- This is real easy to do! Go to “Setup” and search for “Pages”.
- Once on Pages, click “New”. Give your page a label, name and description.

- Check “available for Salesforce mobile apps”
- Delete the sample code and replace with the following code.

<apex:page >
<apex:enhancedList type=”Activity” height=”600″ listid=”00BM0000000OKQp” customizable=”FALSE” rowsPerPage=”10″/>
</apex:page>
Note: This list view is set for 600 pixels, the majority of phones have a screen resolution of 320 pixels high; adjust accordingly for your users.
Step 3: Create a Visualforce tab and add it to Salesforce1
Now that the page is created you’ll need to create a tab to display the results. Here’s step by step how to do that.http://help-jupiter.sfdro.com/apex/HTViewSolution?id=000188546&language=en_US
Be sure to check “Mobile Ready” and add the tab to your selected list under “Mobile Navigation”.
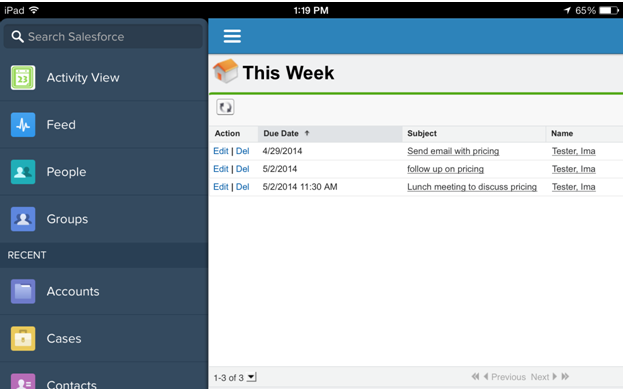
That’s it! Now log into Salesforce1 to test out the new navigation option. In this example, clicking on “Activity View” in the left side navigation will take the user to the list view for “This Week”.
Now your mobile users can see more than just “Today”. They can see any list view that you configure for them. You can even combine list views in one view or create a separate navigation link for different views.
Now if a sales rep is on the road, they can easily glance to see who they are meeting tomorrow and when. If you create a list view for “Next 30 Days” they can even check their calendar in Salesforce1 and schedule follow up appointments with confidence knowing that they are available.
-ST
